Foam rolling the back is the very basic of all foam rolling, and is the best place for a beginner to start!
Getting onto the roller can be a challenge at first if you are a beginner. Remember to “Pinch” the roller between your back and the floor so it doesn’t keep slipping away. ?
Tips For Foam Rolling The Back:
- Keep your hair up so it doesn’t roll under the roller!
- Move straight up and down the spine to avoid injuring ribs
- Use your legs and arms to hold your body up if needed
- Concentrate on one area of the back, then the entire back
Get your foam roller here. This is an affiliate link to our favorite roller.
Simple Steps For Foam Rolling The Back:
- Carefully roll up onto the roller by “pinching” it between your back and the floor
- Keep your hips up, use your arms for support
- Roll the very low back or sacral area first
- Next, roll the “belt” area of the low back, the lumbar area
- Roll the mid and upper back
- Include the entire back in one rolling motion, from tail bone area to the neck
Disclaimer: Foam rolling the calves, and all the stretches or exercises on this site are for those in good physical condition. Check with your doctor to make sure you are in good enough health for physical exercise and stretches. Do these foam rolling exercises at your own risk.
Affiliate Disclosure: There may be affiliate links on this page. If you click on these links and buy something, FamilyFitnessTravel.com may earn a commission with no extra cost to you.
Carefully Get On The Roller
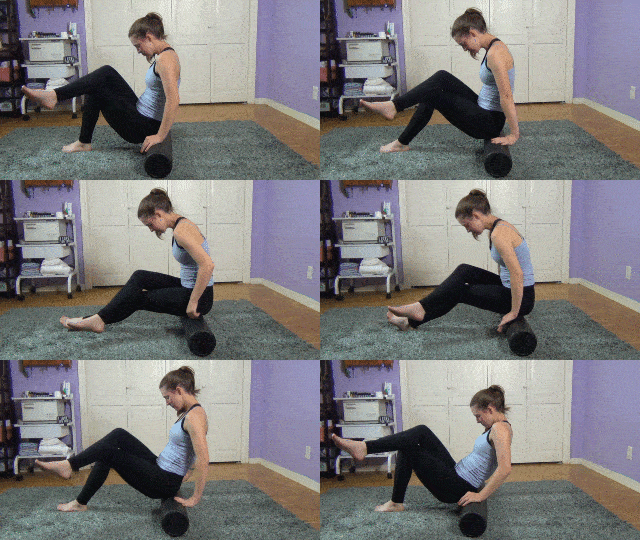
- This BEGINNER STEP about getting on the roller, isn’t shown in the above video, but I hope you get the idea…
- Pinch the roller between your back & ground and roll back
- As you roll back, use your hands on the ground behind you to help lift your hips (not pictured)
- In the front, use your legs to lift your hips up on ONTO the roller
- Keep rolling back until the roller is on your mid-back
- Once on the roller, the rolling part is much easier
- NOTE: If you have long hair, put your hair up or it can get stuck UNDER THE ROLLER!!
Find more of our fitness articles here.
Roll Your Sacral Area (the very low back to the tailbone)
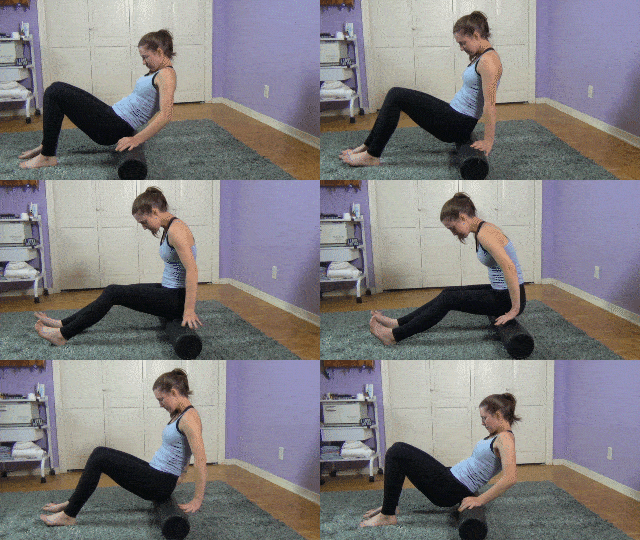
- This is a very short area to roll
- Go slowly
- Put both legs on the ground (not pictured)
- Use your hands to steady yourself behind you (not pictured)
- Put pressure right on the sacral area (if this feels good) to relax
- If this area hurts with pressure from the roller, move up your back, or stop all together
- Use your legs and arms to take some pressure, and sit still with steady pressure on the sacrum
If you have injured your tail bone, you should get familiar with these exercises before you involve your sacral area.
Options if you have an injured Tail Bone:
- Avoid this area
- Use a soft roller, and not the hard black plastic roller
- Roll RIGHT UP TO the painful area, but not ON it
- Use more arm help and lean back, facing the ceiling, so there is less pressure on your tail bone.
Related Article: Back Stretches For Beginners
Roll Your “Belt” Area Of Low Back: The Lumbar Area
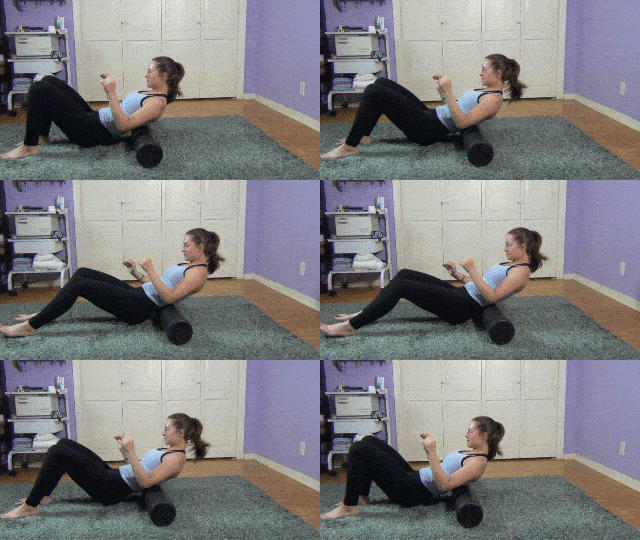
- Roll the “BELT” area of the low back: the LUMBAR area
- Try to go as slow as you can
- Going slow allows you to feel where the roller helps
- Stay centered, and don’t twist side to side
- You can stay motionless in one area if it feels good and gives you relief
- Put your arms behind you for more support
Related Article: Qualities Of A Good Workout Partner
Roll The Mid & Upper Back
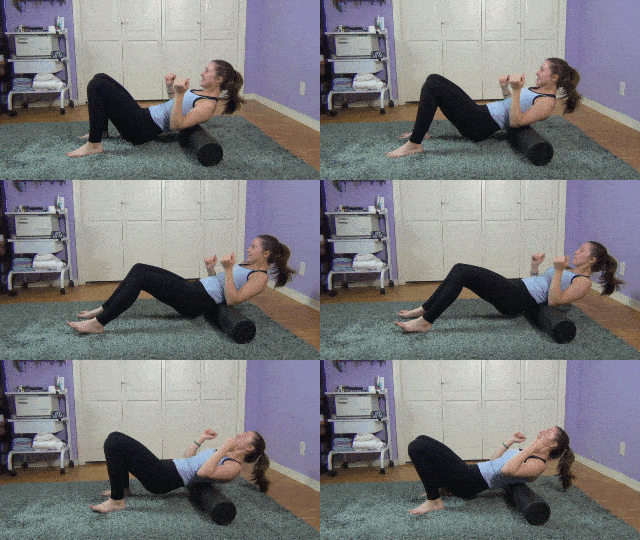
- Roll from the lower to the upper back
- Lift your arms if you have enough balance and confidence to do so
- Without your arms, you also give yourself a little ab workout
- Use your legs to control your movement
- NOTE: AGAIN, if you have long hair, put it up because it can get stuck under the roller and is challenging to get out!
Find out more about our family here.
Roll The Entire Back: Sacrum To Neck
- Roll from the lower to the upper back
- Lift your arms if you have enough balance and confidence to do so
- Without your arms, you also give yourself a little ab workout
- Use your legs to control your movement
- NOTE: AGAIN, if you have long hair, put it up because it can get stuck under the roller and is challenging to get out!
Related: Shoulder Stretches for Pain Relief
Conclusion for Foam Rolling The Back
Foam rolling the back is a great way to relax and unwind.
This is the best place for a beginner to start, and is usually a part of every foam rolling routine.
Simple Steps For Foam Rolling The Back:
- Carefully roll up onto the roller
- Keep your hips up, use your arms for support
- Roll the very low back or sacral area
- Next, roll the “belt” area of the low back, the lumbar area
- Roll the mid and upper back
- Include the entire back in one rolling motion, from tail bone area to the neck
AVOID These Areas When Foam Rolling Your Back:
- Keep off the ribs
- Roll straight up and down the spine, targeting the muscles on either side of the spine
- Don’t twist, instead stay rolling straight up and down
- Stop at the neck, until you are not a beginner, and understand foam rolling better
Like with any foam rolling, if you feel intense pain, you should stop!


